
Plan a room and turn it into a quote
In this tutorial you’ll plan a kitchen in the Room Planner and turn it into a quote. You’ll start a design, draw three walls, place two cabinets against the back wall, and create a quote whose line items come from the plan.
It takes about fifteen minutes.
Before you start
Section titled “Before you start”You need:
-
The Designer or Order Manager role.
-
A customer with a project, an area, and a project address. Use the one from your role’s first tutorial:
- Designers: Alex Rivera, with Rivera Kitchen and Kitchen, from part 1 of Your first quote as a designer.
- Order Managers: Jordan Lee, with Lee Kitchen Remodel and Kitchen, from part 1 of Your first order.
If you haven’t done that tutorial, do its first two sections, adding the customer and the project’s address, and stop there.
-
A mouse or trackpad, and a window at least as wide as a laptop screen.
The steps below use Jordan Lee’s names. If you’re a designer, use Alex Rivera, Rivera Kitchen, and Kitchen instead. This tutorial creates a new quote; it doesn’t change the order from your first tutorial.
Start a design
Section titled “Start a design”A design is a room laid out in the Room Planner. One on the Designs page isn’t an order yet, and only you can see it.
-
In the left menu, select Designs.
-
Select Start Design.
-
In Select Catalog to Start Design, select Select catalog on the catalog your organization uses for orders, then select Start Design.
The new design opens, called “Untitled design”.
-
Select the name, type “Lee Kitchen” (or “Rivera Kitchen”), and press Enter.
Set the presets
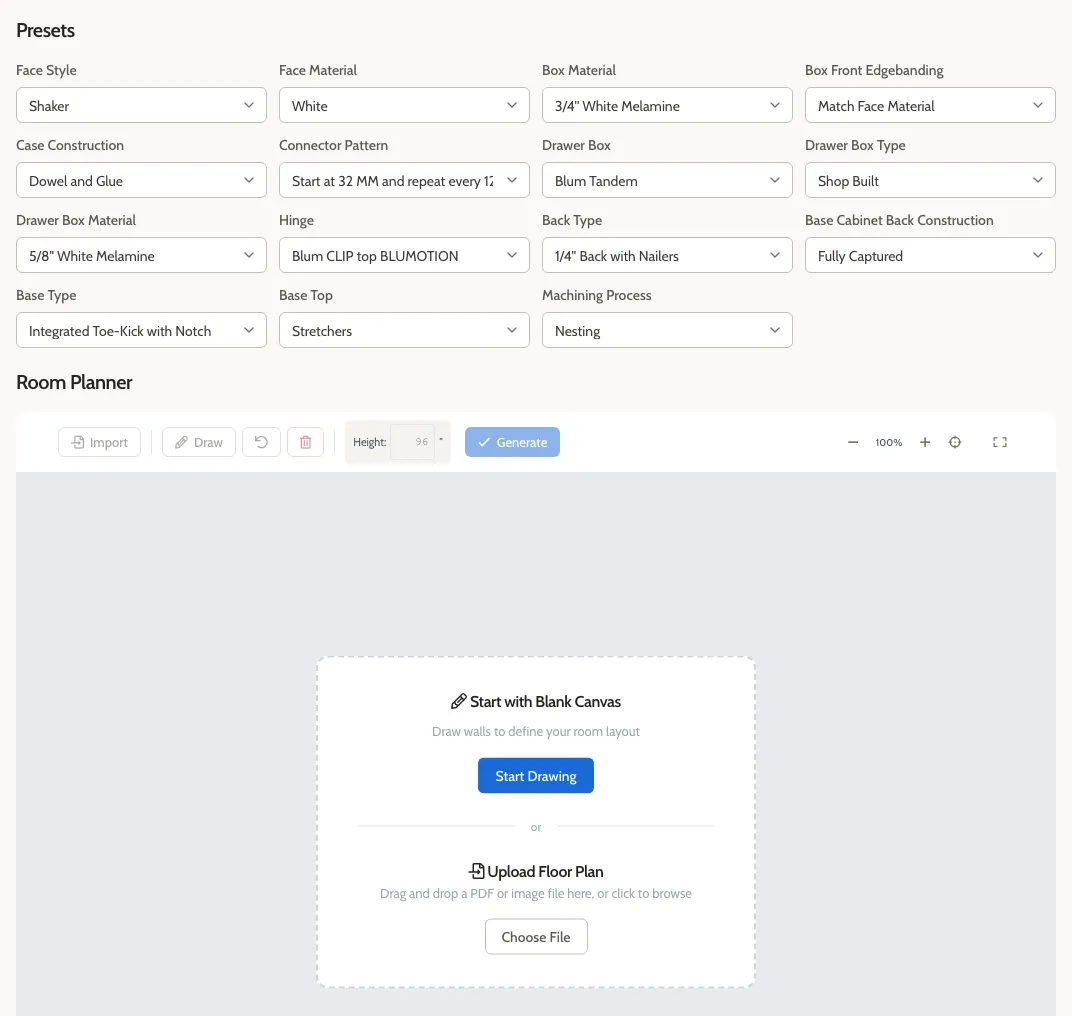
Section titled “Set the presets”The Room Planner stays locked until every preset has a value. Until then, it says “Please give all Presets a value before using the Room Planner.”
- In Presets, fill in every field. If you don’t know what the customer wants, pick the first option in each list. For number fields, type a value, then press Tab.
- Select Save.
The presets are saved: the Save button goes away, and the Room Planner below shows Start with Blank Canvas and Upload Floor Plan.
Draw the walls
Section titled “Draw the walls”You’ll draw a U-shaped kitchen: a 12-foot back wall, an 8-foot side wall, and a 12-foot front wall, open on the left. Lengths are in inches.
-
Scroll down so the whole Room Planner is on screen.
-
Select Start Drawing. A grid appears.
-
Click near the top left of the grid to start the first wall.
-
Move the pointer to the right, type
144, and press Enter. A 144-inch wall runs to the right. You don’t need to click in a text box; just type. -
Move the pointer down, type
96, and press Enter. -
Move the pointer to the left, type
144, and press Enter. -
Move the pointer away from the walls, and check them: three walls, joined at the corners, open on the left. A line may still follow your pointer from the last corner; that’s the next wall waiting to be drawn and isn’t part of the room.
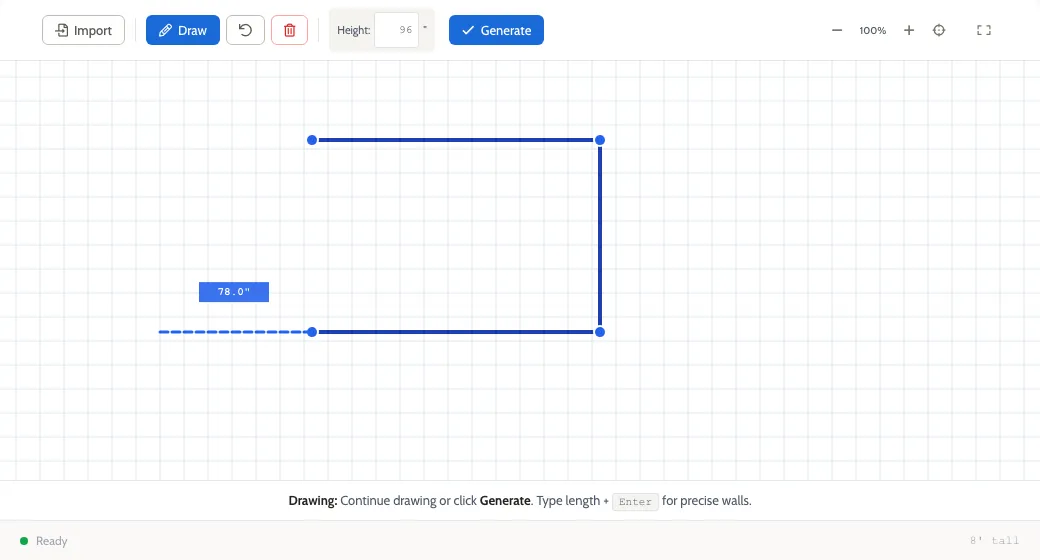
If a wall went the wrong way, select the undo button next to Draw (Undo Last Wall) and draw it again.
-
Select Generate.
The room appears with its walls labeled A, B, and C. The Cabinet Library opens on the left, and Wall Openings on the right.
The walls aren’t saved yet, and nothing warns you if you leave: Save stays unavailable until you place something. Carry straight on to the next section without leaving the page, or you’ll have to draw the walls again.
Place the first cabinet and save
Section titled “Place the first cabinet and save”-
In Cabinet Library, select a floor-standing base cabinet, one about 36 inches wide if your catalog has one. Your catalog’s product codes will differ from the screenshots.
-
Move the pointer onto the room, just inside wall A (the top wall), and click.
The cabinet appears against the wall, and its options open on the right.
-
Select Save.
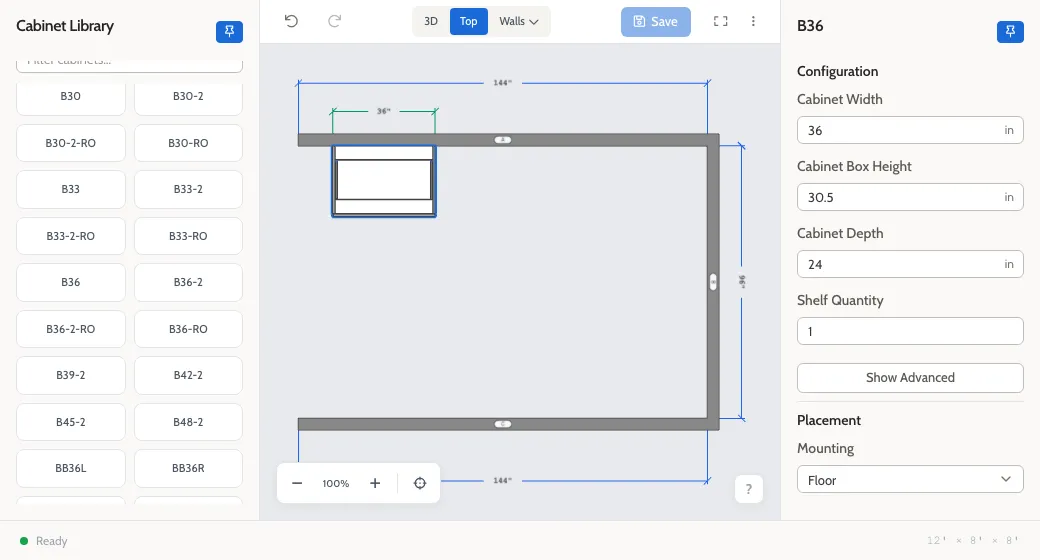
Save turns gray, and the dot before the page’s name in your browser tab goes away. The room and the cabinet are saved.
Place a second cabinet and change it
Section titled “Place a second cabinet and change it”-
In Cabinet Library, select a narrower base cabinet, such as a drawer base.
-
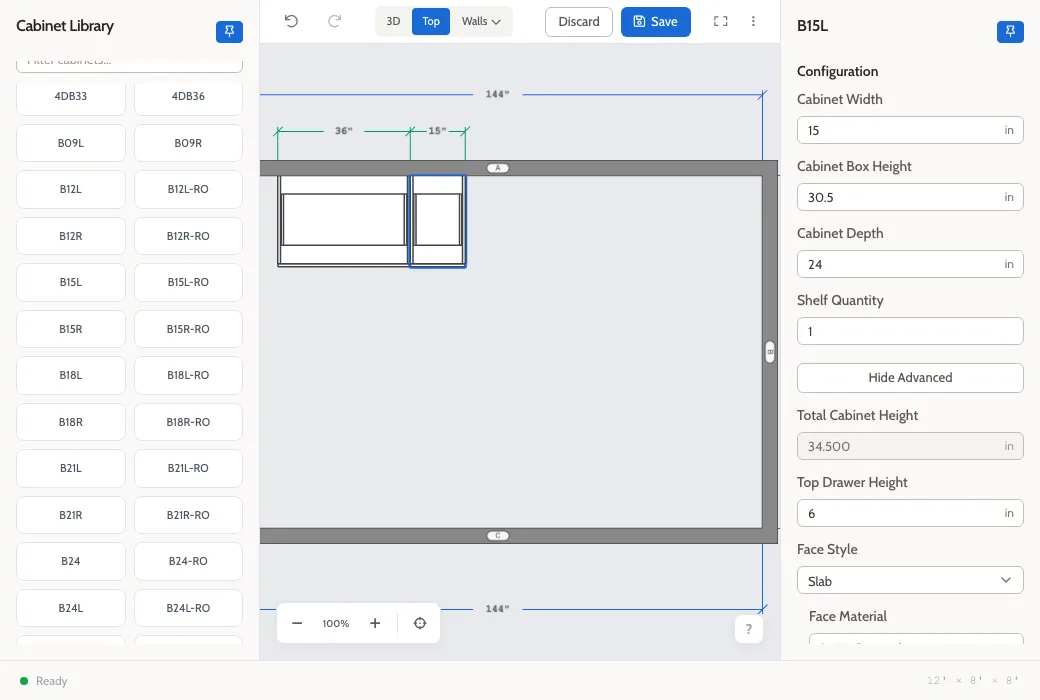
Click just to the right of the first cabinet, inside wall A. It lines up against the first one.
-
With the new cabinet selected, change one of its options in the right-hand panel. For example, choose a different Face Style. If you don’t see the option, select Show Advanced to list the rest.
-
Select Save.
Look at the wall
Section titled “Look at the wall”-
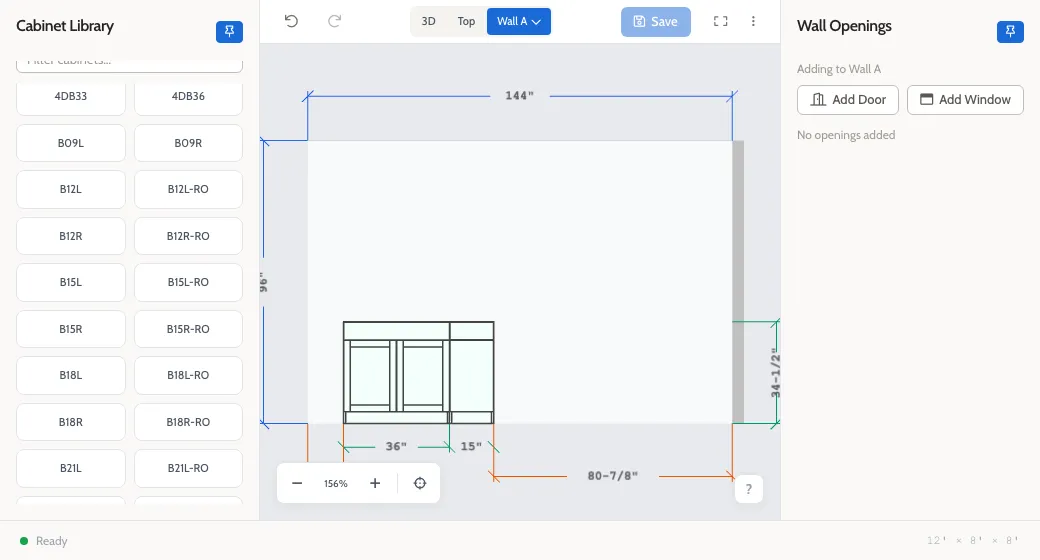
Above the room, select Wall A. If you don’t see it, open Walls first and choose it there.
You see wall A from inside the room, with both cabinets and their dimensions.
-
Select Top to go back to the view from above. Select 3D to look around the room; drag to turn the view.
Link the design to the customer
Section titled “Link the design to the customer”- Scroll to the top of the page and select Link to existing….
- In Customer or project, type the customer’s name,
Jordan LeeorAlex Rivera, and choose them. - Choose their project, Lee Kitchen Remodel or Rivera Kitchen, and Kitchen as the Area.
- Select Link.
The page shows Linked records with the customer, project, and area, such as Jordan Lee › Lee Kitchen Remodel › Kitchen.
Create the quote
Section titled “Create the quote”Creating a quote turns the design into an order. The design leaves your Designs list, and from then on you change the room on the quote’s Design tab.
-
Select Create quote at the top right.
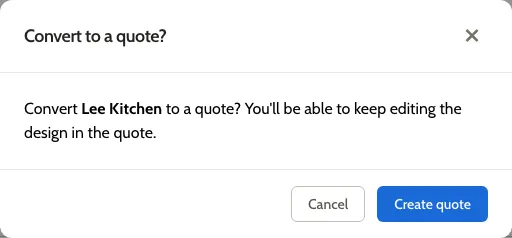
-
In Convert to a quote?, select Create quote.
The new quote opens on its Line Items tab. Check that:
- The top of the page shows a new order number with a Quote badge, and the customer, project, and area.
- There’s one line item for each cabinet, with the option you changed, and a cube icon at the end of each row.
- If the option you changed is also one of the presets, such as Face Style, that cabinet’s row has a warning icon, because it no longer matches the order’s presets. That’s expected; see Change a line item.
- The Design tab shows the room and both cabinets.
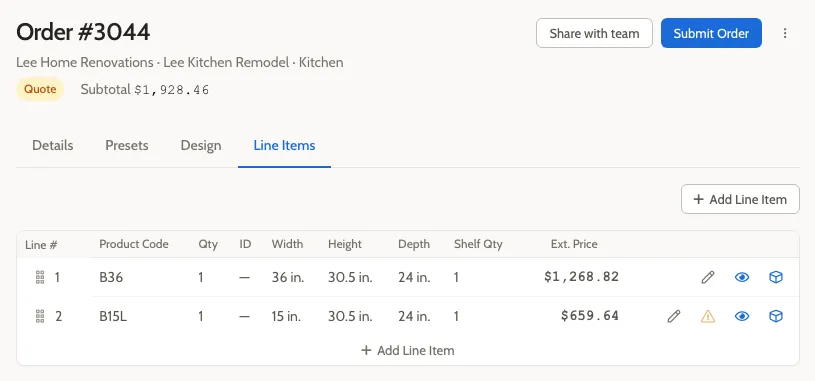
The cube icon marks a cabinet that belongs to the design. You change or remove those cabinets on the Design tab, not in the line items table.
What you did
Section titled “What you did”- Started a design and set its presets.
- Drew a room and generated it.
- Placed two cabinets, saving after the first.
- Changed a cabinet’s options and looked at a wall.
- Linked the design to a customer and turned it into a quote.
Next steps
Section titled “Next steps”- The quote works like any other: you can submit it. For what happens next, designers can see part 2 of Your first quote as a designer, and Order Managers part 2 of Your first order.
- Learn where a design lives and how it relates to an order’s line items in How designs become orders.
- Look up every mouse and keyboard control in Room Planner controls.
- To start from a floor plan drawing instead of typing lengths, see Draw a room’s walls.