
Draw a room's walls
Every plan starts with walls. You can draw them on a blank grid by typing their lengths, or trace them over a floor plan drawing. Both end with Generate, which builds the room.
Where to start
Section titled “Where to start”- On the Designs page: open the design from Designs. The Room Planner is below Presets. See Start a design.
- On a quote: open the order and select the Design tab. You can do this while the order is a Quote, if you created it or it’s shared with your team.
Either way, every preset needs a value first. Until then the planner says “Please give all Presets a value before using the Room Planner.”
To change the wall height from the usual 96 inches, set Height in the toolbar before you generate. It goes from 84 to 144 inches.
Draw walls by typing lengths
Section titled “Draw walls by typing lengths”-
Select Start Drawing.
-
Click on the grid where the first wall starts.
-
Move the pointer in the direction the wall runs, type its length in inches, and press Enter. You don’t need to click in a box first.
The next wall starts where that one ended.
-
Repeat for each wall.
-
Check the walls, then select Generate.
The room appears with the Cabinet Library. It isn’t saved yet, and nothing warns you if you leave the page.
-
Place a cabinet or add a door or window, then select Save.
Save grays out, and the room is saved.
Walls run straight across or straight up and down. Hold Shift to draw one at an angle. You can also click to end a wall instead of typing its length, but typing is exact.
While drawing:
- To fix a typo in the length, press Backspace. Escape clears the length; pressing it again stops the wall you’re drawing.
- To remove the last wall, select the undo button next to Draw (Undo Last Wall).
- To remove every wall and start over, select the trash can icon (Clear All Walls), then Clear All Walls in the Clear all walls? dialog. This can’t be undone. On a traced floor plan, it also resets the scale, so you’ll need to set it again. If you haven’t drawn any walls, it clears straight away.
A room doesn’t have to be closed. Leave a side open where there’s no wall to build against.
Trace a floor plan
Section titled “Trace a floor plan”You can trace over a PDF or an image of a floor plan. For a PDF, only the first page is used.
-
Select Choose File under Upload Floor Plan and pick the file, or drag the file onto the planner.
-
Set the scale:
- Click one end of something you know the length of, such as a dimensioned wall.
- Click the other end.
- Type the real distance in inches in the box that appears, and select the check mark (Apply Scale).
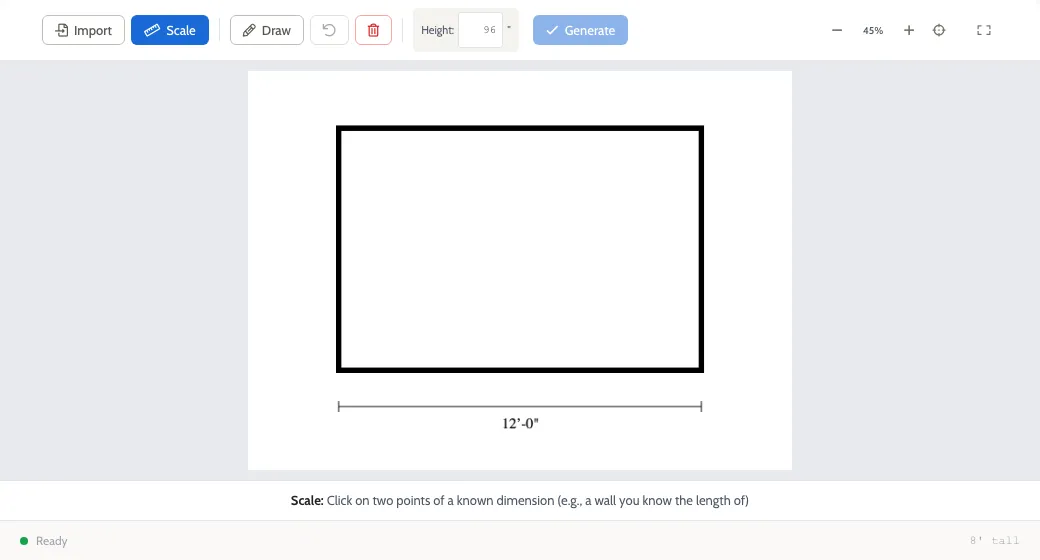
-
Click each corner of the room in turn to trace its walls. For exact lengths, type them as you would on a blank grid.
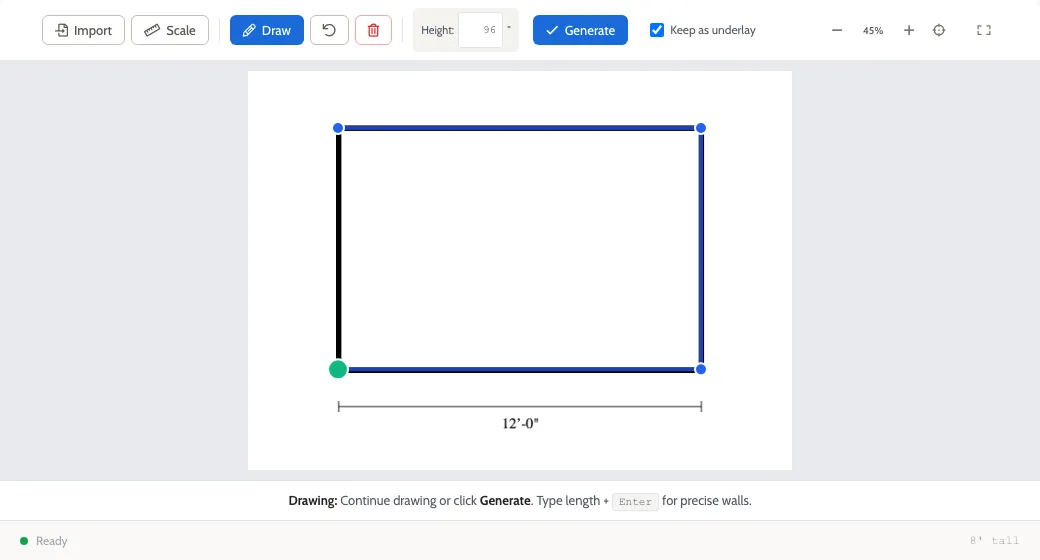
-
Leave Keep as underlay checked to keep the drawing under the room, or uncheck it to hide it.
-
Select Generate. The room isn’t saved yet.
-
Place a cabinet or add a door or window, then select Save.
Zooming is off while you trace over a floor plan, so the scale stays right. If the scale is wrong, select Scale and click two new points. Clicked corners are only as exact as your clicks: a traced 12-foot wall can come out as 144⅝ inches. Type lengths where it matters.
You can hide the underlay later in Wall Settings, under PDF Underlay.
After you generate
Section titled “After you generate”The room appears with its walls labeled A, B, C, and so on, and the Cabinet Library opens.
The walls aren’t saved yet, and Save stays unavailable until you place a cabinet or add a door or window. Place something, then select Save. If you leave the page first, the walls are lost and you’ll need to draw them again. See Place and arrange cabinets.
There’s no way to change the walls after this. If they’re wrong on a design on the Designs page, start a new design.