
Change a cabinet's options
A cabinet placed in the Room Planner is configured in the planner, not on the Line Items tab. Its row there shows a cube icon: select it to jump to the cabinet on the Design tab.
Change one cabinet
Section titled “Change one cabinet”-
Click the cabinet to select it.
-
In the right-hand panel, under Configuration, change the options you need. The view updates as you go.
The most common options are shown first. Select Show Advanced for the rest.
-
Select Save.
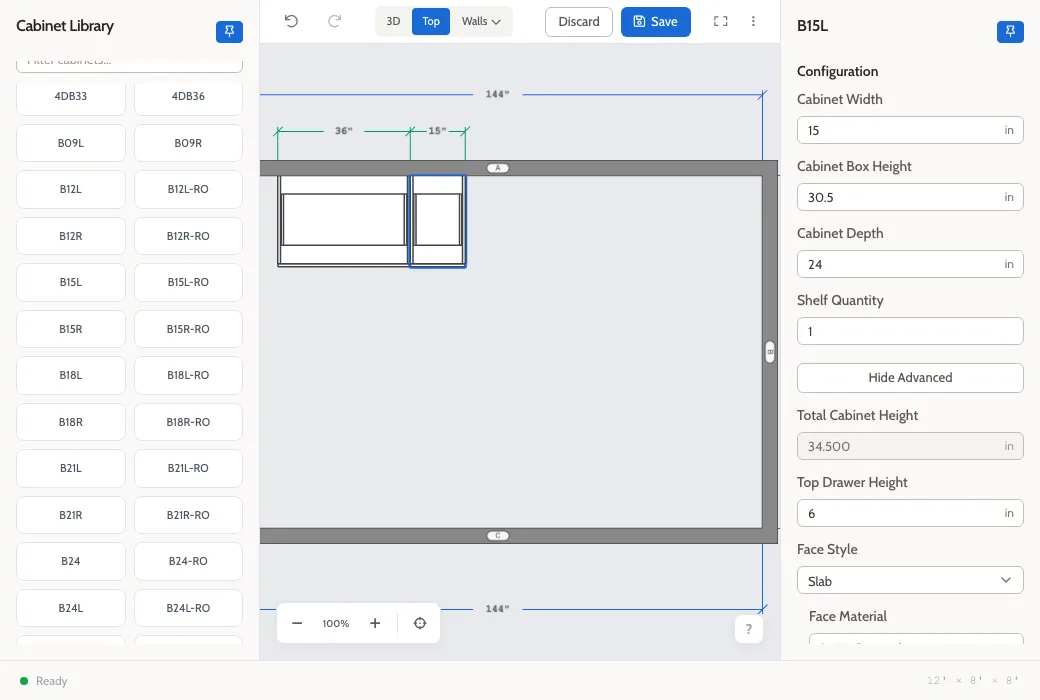
On an order, saving updates the cabinet’s line item and its price.
Change several cabinets at once
Section titled “Change several cabinets at once”-
Select the cabinets: hold Shift and click each one, or hold Shift and drag across them.
The panel’s title shows how many are selected, such as 2 Cabinets Selected, and says “Editing an option applies it to all 2 selected cabinets.”
-
Change an option. It changes on every selected cabinet.
-
Select Save.
Only the options every selected cabinet has are listed. An option that’s blank is one where the cabinets currently differ; choosing a value sets them all to it. To change placement, select one cabinet at a time.
Options that are also presets
Section titled “Options that are also presets”Some options, such as depth or materials, may also be order presets. Changing the order’s presets later sets that option on every cabinet in the plan, replacing the value you chose here. See Change presets on an order with a design.
Related
Section titled “Related”- Place and arrange cabinets
- Change a line item for products that aren’t in the design.