
Your first order, part 1: enter it for a customer
In this tutorial you’ll take a customer who calls in with a kitchen project and turn it into a submitted order. You’ll add the customer, create an order for their kitchen, fill it in, and submit it.
It takes about fifteen minutes. Part 2 takes the same order through to shipped.
Before you start
Section titled “Before you start”You need:
- The Order Manager role. If you have it, Dashboard appears at the top of the left menu.
- At least one catalog set up for your organization. Every organization has its own catalogs, so the presets and products you see will differ from the screenshots here. That’s expected.
The tutorial uses a made-up customer, Jordan Lee, who is remodeling their kitchen.
Add the customer
Section titled “Add the customer”-
In the left menu, select Customers.
-
Select Add Customer.
-
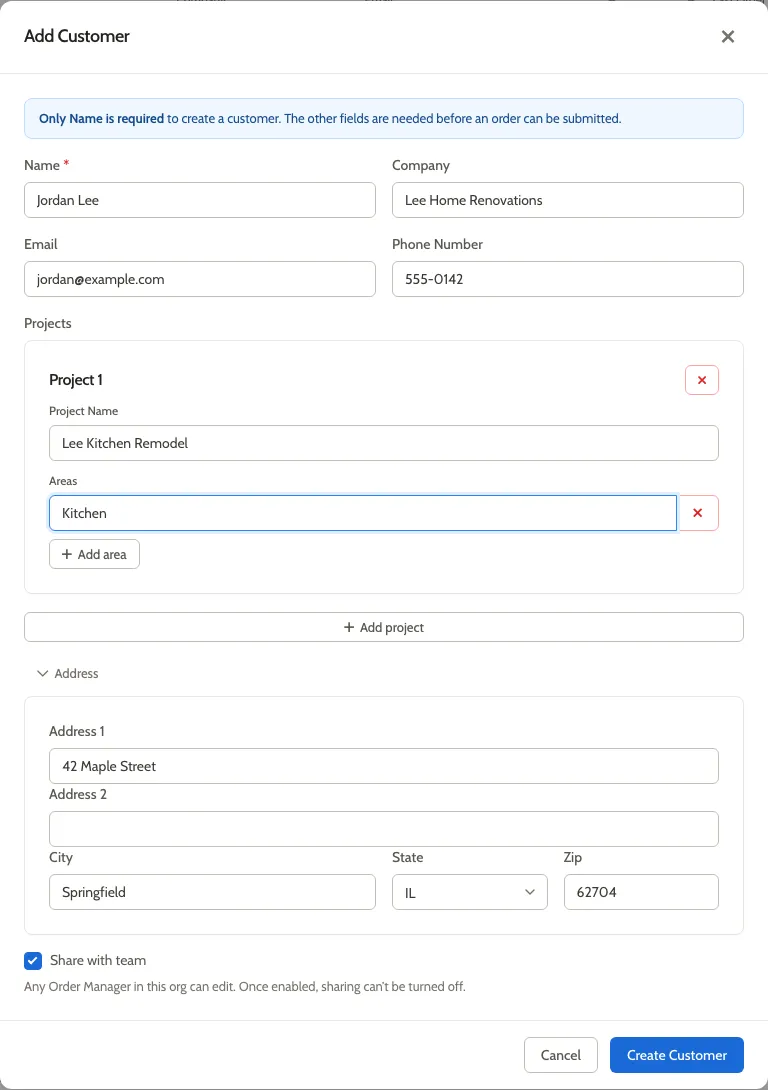
Fill in the customer’s details:
- Name: Jordan Lee
- Company: Lee Home Renovations
- Email: jordan@example.com
- Phone Number: 555-0142
-
Select Add project and name it “Lee Kitchen Remodel”.
-
Under the project, select Add area and name it “Kitchen”.
-
Select Add address and fill it in:
- Address 1: 42 Maple Street
- City: Springfield
- State: IL
- Zip: 62704
-
Leave Share with team checked. It lets other Order Managers edit this customer too.
-
Select Create Customer.
Jordan Lee’s page opens, with Lee Kitchen Remodel listed under Projects.
Add the project’s address
Section titled “Add the project’s address”The project’s address is where the cabinets will be installed. The Add Customer form doesn’t ask for it, so add it now.
-
Under Projects, select Lee Kitchen Remodel.
-
On the Overview tab, select Edit Details.
-
Fill in the same address as the customer: 42 Maple Street, Springfield, IL, 62704.
-
Select Save.
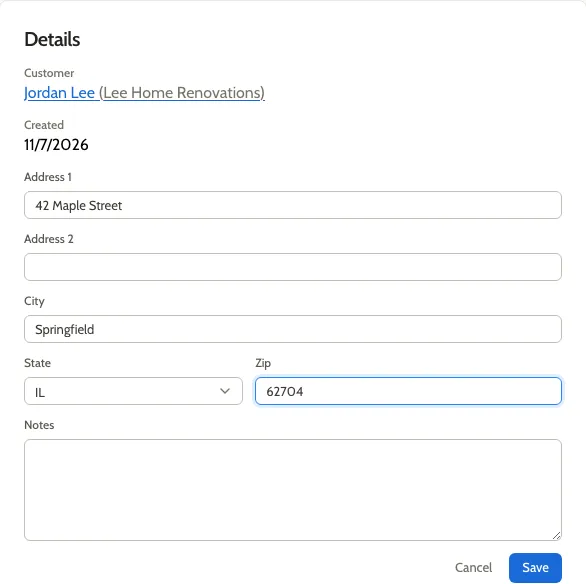
The Details card now shows the address.
Create the order
Section titled “Create the order”- In the Details card, select Jordan Lee (Lee Home Renovations) to go back to the customer’s page.
- Under Orders, select Create Order.
- Choose Lee Kitchen Remodel as the Project and Kitchen as the Area.
- Select Continue to Catalog.
- Select the catalog your organization uses for orders. A catalog is the set of products you can order from.
- Leave Share with team checked, and select Create Order with Catalog.
The new order opens on the Presets tab. Its status is Quote, and the top of the page shows the company, project, and area it’s for.
Set the presets
Section titled “Set the presets”Presets are choices that apply to every product in the order, such as materials or sizes.
-
Fill in every preset.
For number fields, type a value within the range shown under the field, then press Tab.
-
Watch for new fields. Choosing a value can bring up more presets that depend on it. Fill those in too.
-
Select Save.
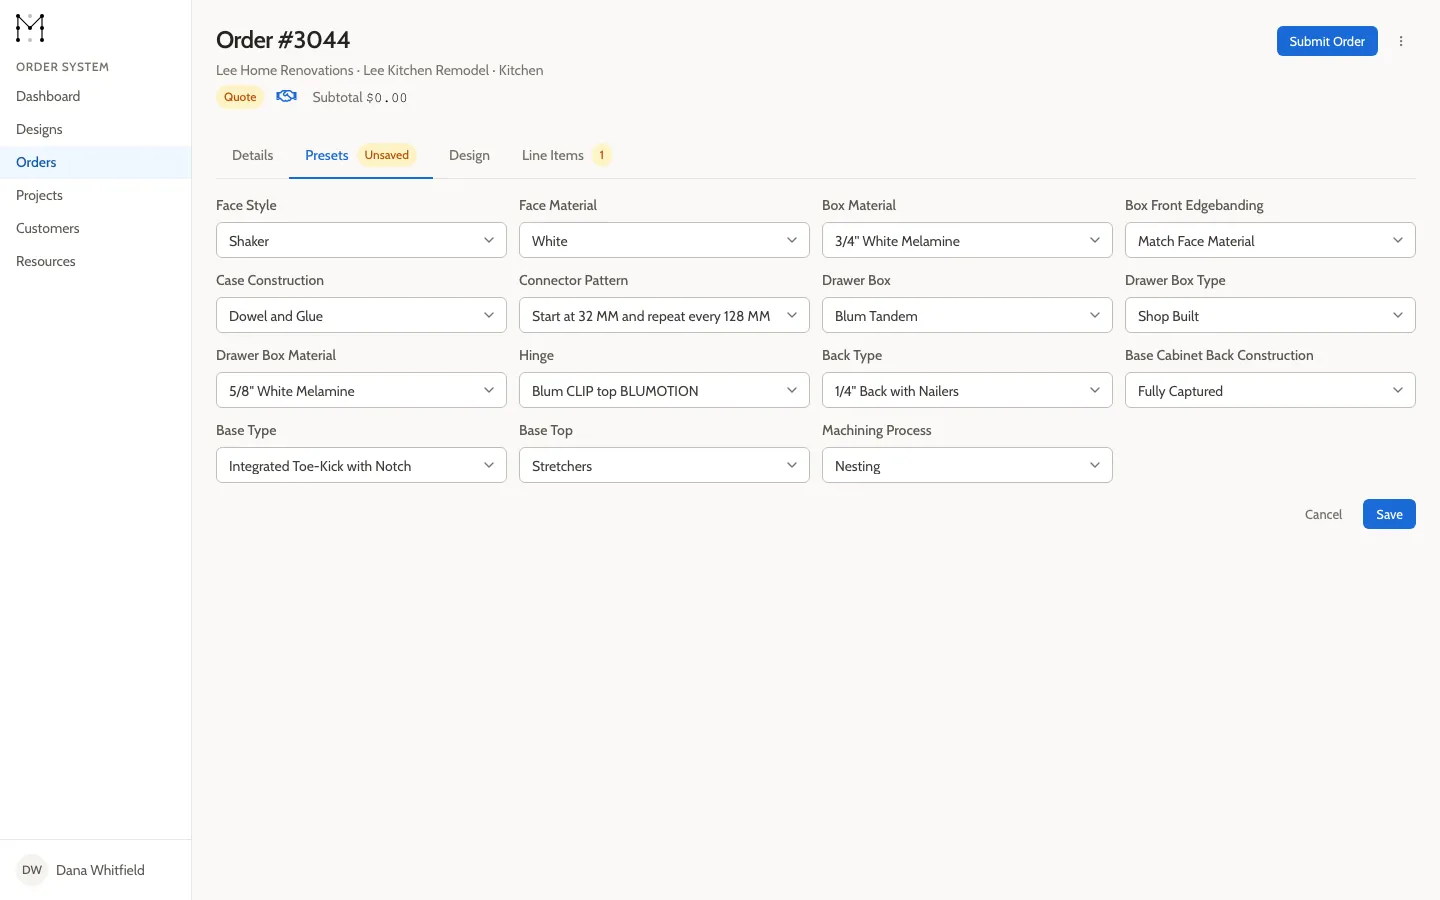
The presets are saved: the Unsaved badge on the tab and the Save button go away.
Add a line item
Section titled “Add a line item”Each product in an order is a line item.
-
Select the Line Items tab.
-
In the empty row, open Product Code and choose a product your shop builds often.
-
Type
1in Qty. -
Select the save button (the disk icon) at the end of the row. If it’s grayed out, check Qty has a number in it.
The line item’s price appears in Ext. Price, and the Order Summary shows the subtotal.
-
Select the configurator button (the gear icon) in the row to open the product in the Article Preview and see it in 3D. Select Close when you’re done looking.
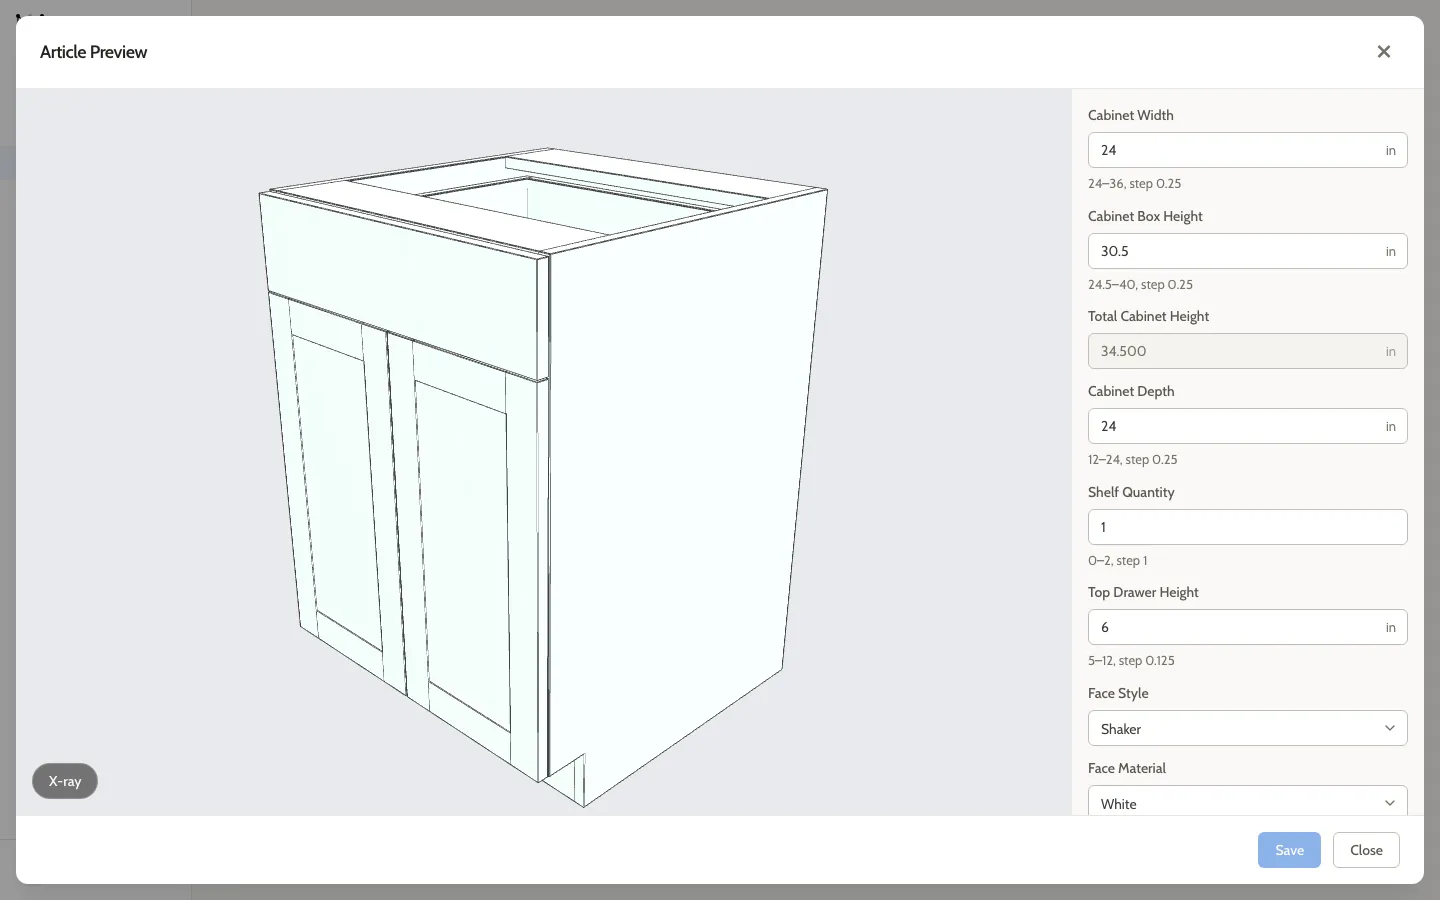
One line item is enough for this tutorial.
Submit the order
Section titled “Submit the order”- Select Submit Order.
- When you’re asked “Submit this order for review?”, select Submit order.
The status changes to Submitted.
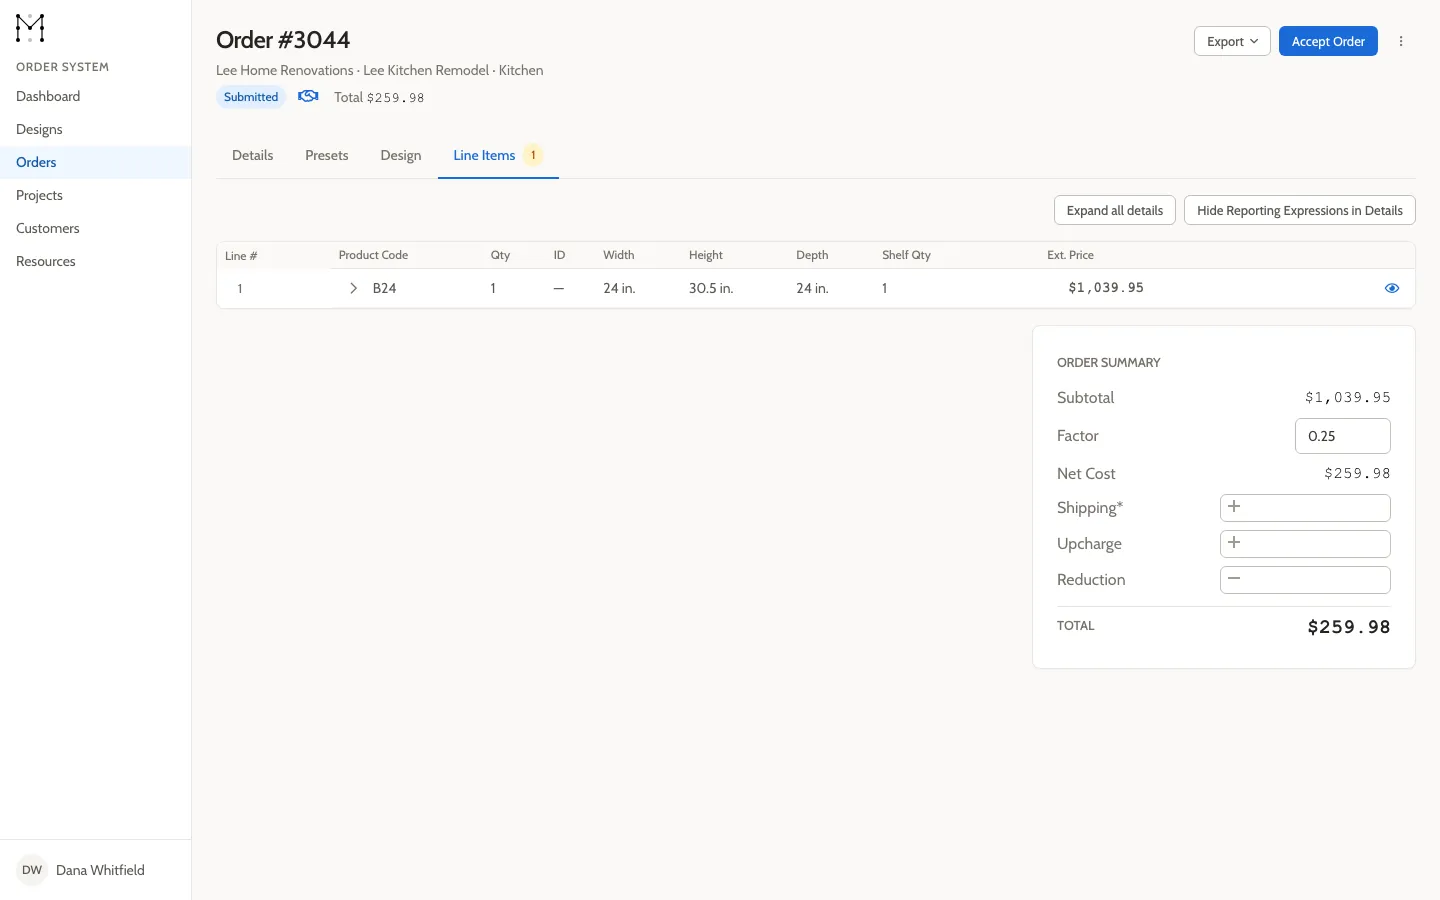
The Line Items tab now shows a badge for a missing field. That’s the shipping price, which gets filled in during pricing in part 2.
You created this order, so you’re its submitter: the person who accepts its final price. You’ll do that in part 2.
What you did
Section titled “What you did”You entered a complete order for a customer:
- Added the customer, with their project and area.
- Added the project’s address.
- Created an order for the kitchen.
- Set its presets and added a line item.
- Submitted it.
Next steps
Section titled “Next steps”- Continue with part 2 to price this order and see it through to shipped.
- To add more products or change presets on a quote, see Add line items to an order and Set an order’s presets.
- Learn how customers, projects, and areas fit together in Customers, projects, and areas.