
Add doors and windows
Doors and windows show in the Room Planner’s views and on the exported drawings. They aren’t products, so they don’t become line items. You can add them any time after generating the room.
-
Choose the wall. Above the room, select its button, such as Wall A. If you don’t see it, open Walls first and choose it there. The Wall Openings panel on the right says which wall you’re adding to, such as “Adding to Wall A”.
If Wall Openings isn’t showing, choose it from the ⋮ menu (More actions).
-
Select Add Door or Add Window.
A door starts 36 inches wide and 80 inches tall. A window starts 36 by 48 inches, 36 inches above the floor.
-
In the card that opens, change Width, Height, Offset (how far along the wall it starts), or, for a window, Sill height. Values are in inches.
-
Select Save.
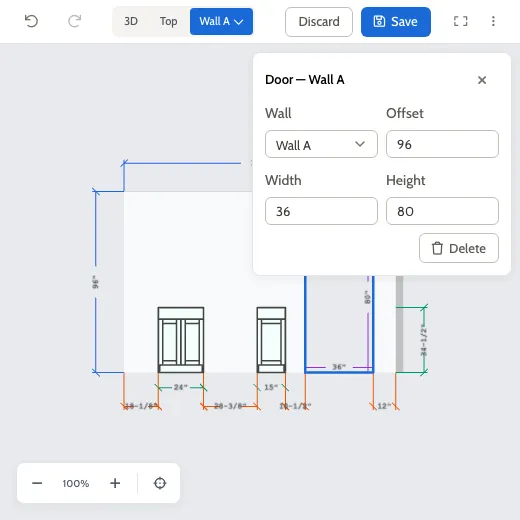
You can also drag a selected door or window along its wall. The planner doesn’t warn you if an opening overlaps a cabinet, so check the wall view.
Change or remove a door or window
Section titled “Change or remove a door or window”Select the door or window in the view, or its row in the Wall Openings list, to open its card. To remove it, select Delete in the card, or the × in its row. Select Save afterwards.